Safe, Code-Compliant Electrical Upgrades for Indianapolis Homes
Posted in

Safe, Code-Compliant Electrical Upgrades for Indianapolis Homes

A flickering light may be a minor fixture problem—or an early warning that an older electrical system cannot safely support modern household loads. New construction, remodels, service changes, and equipment additions all require careful planning before wires are installed or breakers are changed.

For homeowners comparing residential electrical installation services, the work can include far more than basic wiring. A complete installation may involve load calculations, grounding and bonding, dedicated circuits, panel capacity, lighting, safety devices, permits, and final testing.

Zimmerman Electric Indy approaches each project by evaluating the existing system, the home’s intended use, and likely future demand. That is especially important in Indianapolis and surrounding Central Indiana communities, where older housing stock, severe storms, additions, and electrification projects often place new demands on existing infrastructure. More information is available from zimmermanelectricindy.

Residential Electrical Installation Services for New and Existing Homes

Electrical planning differs substantially by project type:

  • New construction: Electricians design the wiring layout before walls are closed, coordinate service size and panel locations, and install rough-ins for lighting, receptacles, HVAC, appliances, communications, and future equipment.
  • Older homes: The assessment may uncover ungrounded receptacles, limited service capacity, cloth-insulated conductors, deteriorated insulation, or modifications that do not meet current standards.
  • Renovations and additions: The electrician must connect new work to the existing system without overloading circuits, while accounting for wall access, finished surfaces, and structural constraints.
  • Garages and outbuildings: These may require underground feeders, disconnects, grounding electrodes, weather-resistant equipment, and separate load calculations.

A sound design considers conductor sizing, voltage drop, overcurrent protection, grounding and bonding, arc-fault circuit interrupter (AFCI) protection, ground-fault circuit interrupter (GFCI) protection, and spare panel capacity. Indianapolis projects may also involve permits and inspections through the Department of Business and Neighborhood Services (DBNS), depending on the scope.

Wiring, Circuits, Panels, and Whole-Home Power Improvements

Home Electrical Wiring and Dedicated Circuits

A dedicated circuit supplies one major appliance or system without sharing its load with general-purpose receptacles. It is commonly used for:

  • Electric ranges, ovens, dishwashers, disposals, refrigerators, and microwaves.
  • Laundry equipment, water heaters, furnaces, air conditioners, and heat pumps.
  • Bathroom receptacles, kitchen countertop receptacles, home offices, workshops, and garage equipment.
  • EV chargers, hot tubs, sump pumps, and standby generator equipment.

Adding a larger breaker to stop nuisance tripping is unsafe unless the conductors, equipment, and service are rated for it. An electrician diagnoses the circuit by checking breaker size, conductor gauge, termination condition, voltage, current draw, and connected loads. New wiring may be installed through accessible framing, attics, basements, crawlspaces, or carefully opened walls.

Electrical Panel Upgrades and Replacements

Frequent breaker trips, warm panel covers, buzzing, corrosion, inadequate spaces, and flickering lights can indicate capacity or equipment problems. A panel upgrade may also be appropriate before adding central air conditioning, an induction range, heat pump, EV charging, or a workshop.

Many older homes have 100-amp service, while a 200-amp service may better accommodate modern loads—but the correct size depends on a formal dwelling load calculation. The utility service, meter equipment, service entrance conductors, grounding electrode system, and panel must be compatible.

Federal Pacific Stab-Lok and Zinsco panels deserve professional evaluation because documented failure concerns and aging components can increase risk. Aluminum branch-circuit wiring and other legacy systems also require specialized inspection; replacement, approved terminations, or other corrective work may be necessary.

Whole-Home Rewiring

Rewiring is not automatically required because a home is old. An electrician typically maps circuits, opens representative boxes, examines insulation and connections, tests grounding and polarity, checks for overheating, and reviews the service equipment. Replacement becomes more likely when the system has:

  • Brittle cloth or rubber insulation.
  • Ungrounded two-wire branch circuits where grounding is needed.
  • Extensive aluminum wiring or unsafe splices.
  • Repeated overheating, improper extensions, or undocumented alterations.
  • A major renovation that exposes walls and makes access more efficient.

A complete rewire should include correctly sized copper or approved conductors, grounding and bonding, AFCI and GFCI protection where required, labeled circuits, and verification testing.

Lighting, Outlets, Safety Devices, and Smart Home Installation

Residential installations may include recessed LED fixtures, chandeliers, ceiling fans, dimmers, under-cabinet lighting, and hardwired smoke alarms. Exterior work can cover entry lighting, garage fixtures, landscape illumination, security lighting, and outdoor living spaces. Equipment exposed to moisture generally requires weather-resistant products, appropriate covers, and GFCI protection.

Outlet and switch upgrades may include:

  • Tamper-resistant receptacles in required living areas.
  • GFCI receptacles or breakers in kitchens, bathrooms, garages, unfinished basements, laundry areas, and outdoor locations.
  • USB or USB-C charging receptacles, provided box depth and circuit conditions are suitable.
  • Smart switches and dimmers compatible with the home’s wiring, neutral conductor, lighting load, and wireless system.

Smoke and carbon monoxide detector installations require attention to placement, power source, battery backup, and interconnection. Whole-house surge protective devices installed at the service panel can help reduce transient-voltage damage from lightning and utility disturbances common during Indiana storms, although no device eliminates every surge risk.

Smart-home reliability begins with sound electrical infrastructure. A stable neutral, adequate box volume, dependable Wi-Fi placement, and correctly rated controls matter more than simply selecting a connected device.

Electrical Installations for EVs, Generators, Hot Tubs, and High-Demand Equipment

A Level 2 EV charger commonly requires a 240-volt branch circuit, suitable breaker, conductor ampacity, panel space, and—depending on equipment and location—a disconnect. Pre-wiring during a remodel can reduce future wall and trenching costs. Charger output should be matched to the vehicle, daily driving needs, and service capacity.

A generator connection requires approved transfer equipment that prevents backfeeding utility lines. Portable generator inlets, manual transfer switches, and automatic transfer switches must be installed with correct grounding, interlocking, overcurrent protection, and separation from utility power.

Hot tub and spa installations typically require a nearby disconnect, GFCI protection, weather-resistant equipment, and proper bonding. Local placement rules and manufacturer instructions also affect the installation.

High-demand equipment cannot be made safe simply by installing a larger breaker. A load calculation evaluates existing service demand, continuous loads, heating and cooling equipment, appliances, EV charging, and future additions. Energy-efficient appliances may reduce operating demand, but they still require correctly designed circuits and equipment.

What Indianapolis Homeowners Can Expect During an Installation

Assessment, Scope, and Written Estimate

The process should begin with an in-home evaluation covering:

  • Existing panels, wiring, grounding, access, and visible defects.
  • Project goals, equipment specifications, anticipated loads, and future capacity.
  • Wall, ceiling, attic, crawlspace, trenching, and patching requirements.
  • Materials, labor, permits, inspections, testing, and cleanup.

A written estimate should identify the scope, equipment, assumptions, exclusions, and price. Typical cost ranges vary widely: a small dedicated circuit or fixture installation may cost roughly $250–$900; a panel replacement may range from about $1,500–$4,000; and whole-home rewiring can exceed $10,000, depending on access, finishes, service changes, and permit requirements. These are planning ranges, not fixed quotes.

Homeowners can help by clearing work areas, identifying concealed utilities, securing pets, and providing access to panels, crawlspaces, and attics.

Installation, Inspection, and Cleanup

A professional installation generally includes a controlled shutdown, circuit identification, equipment installation, conductor termination, grounding verification, labeling, and operational testing. The electrician may test polarity, voltage, GFCI/AFCI function, continuity, and equipment operation.

Work should follow the applicable National Electrical Code (NEC) provisions, manufacturer instructions, and Indianapolis DBNS requirements. Permits or inspections may apply to service changes, new circuits, remodels, additions, EV chargers, generators, and other work; the exact requirements depend on the project and jurisdiction.

Good residential practice also includes floor protection, shoe covers, drop cloths, communication about outages, and removal of installation debris. Never attempt energized panel work or improvised wiring. Electrical shock, arc flash, fire, and concealed damage are serious hazards.

When to Request an Electrical Installation Estimate

Request a professional evaluation when planning:

  • New construction, a room addition, kitchen or bathroom remodeling, or a finished basement.
  • A service change, panel replacement, EV charger, generator, hot tub, or workshop.
  • New interior or exterior lighting, smart-home controls, or surge protection.
  • Persistent breaker trips, warm outlets, flickering lights, burning odors, or unexplained power loss.
  • A home purchase involving obsolete panels, aluminum wiring, ungrounded circuits, or aging insulation.

Early assessment can reveal whether the project needs a simple circuit, a coordinated panel upgrade, or broader electrical improvements. It also helps homeowners understand costs, code requirements, access limitations, and future capacity before construction begins.


Reliable Locksmith Help for Homes, Cars, and Businesses in Washington, DC
Posted in

Reliable Locksmith Help for Homes, Cars, and Businesses in Washington, DC

A lockout in Washington, DC can happen outside an apartment in Georgetown, beside a downtown parking garage, or after closing time at a small business. The right response depends on whether the issue is a simple access problem, a damaged lock, a compromised key, or an immediate safety emergency.

When people search for locksmith DC, they are usually looking for a mobile professional who can reach a home, vehicle, office, or commercial property within the District. Before calling, identify the exact location, lock type, vehicle details if applicable, and whether the keys were lost, stolen, broken, or left inside.

D&A 24/7 Locksmiths serves residential, automotive, and commercial customers throughout the DMV area. Regardless of provider, a responsible locksmith should verify authorization, explain the likely work, and provide a clear estimate before drilling, replacing hardware, or programming a key. The relevant topic information is available through da247locksmiths.

24/7 Help for Lockouts and Urgent Security Problems

Home, apartment, office, retail, and vehicle lockouts are among the most common reasons to call a locksmith. After-hours, weekend, and holiday service may be available, but arrival times depend on traffic, technician availability, weather, and the complexity of the call. Ask for an estimated response window rather than relying on an unconfirmed promise.

Start by checking whether another authorized person has a spare key. If keys were stolen, do not simply regain entry and leave the existing locks unchanged; rekeying or replacement may be necessary. If a key is damaged inside the cylinder, avoid forcing it with pliers, which can push fragments deeper or damage the plug.

A child, pet, or vulnerable person locked inside a vehicle is different from a routine lockout. Call 911 first when there is immediate danger, particularly in extreme heat or cold. Then contact a locksmith if directed or if additional assistance is needed. Do not break a window unless emergency responders advise it and there is no safer alternative.

A professional visit typically follows this workflow:

  • Confirm the address, property or vehicle details, and customer authorization.
  • Inspect the lock, door, frame, cylinder, or vehicle entry point.
  • Attempt the least destructive entry method appropriate to the hardware.
  • Explain repair, replacement, or rekeying options.
  • Test the completed work before leaving.

Residential Locksmith Services Across the District

Residential service should be organized around the security problem, not merely the lock brand. A technician may help with:

  • Home lockout entry.
  • Lock repair or complete replacement.
  • Rekeying after a move, lost key, or tenant change.
  • Key cutting and duplication.
  • Deadbolt and doorknob installation.
  • Keypad, smart-lock, and other keyless-entry installation.

Rekeying changes the internal pin configuration so an existing lock works with a new key. It is often sufficient when the hardware is in good condition and the concern is that a former tenant, contractor, roommate, or previous owner still has a key. It usually costs less than replacing multiple lock bodies.

Replacement is more appropriate when the cylinder is worn, the lock has been forced, the housing is corroded, the door does not latch correctly, or the owner wants a different security grade. A locksmith may recommend a Grade 1 or Grade 2 bored lock, a reinforced strike plate, longer screws, or a high-security cylinder depending on the door and risk profile.

Georgetown rowhouses, apartment buildings, and recently purchased properties can present different constraints. Historic doors may have mortise locks or nonstandard dimensions, while rentals may require landlord approval. A technician should confirm backset, door thickness, handing, frame condition, and compatibility before installing a keypad or smart lock. Battery-powered devices also need a plan for low-battery access.

A basic security assessment can identify obvious weaknesses such as loose hinges, inadequate strike reinforcement, exposed glass near a thumb turn, or mismatched keys. It is useful risk guidance, but it is not a guarantee against burglary.

Automotive Locksmith Assistance in Washington, DC

Vehicle lockouts occur in Dupont Circle, downtown garages, residential streets, and areas near Capital One Arena. Automotive locksmith work may include:

  • Car-door and trunk unlocking.
  • Extraction of broken keys.
  • Cutting replacement keys.
  • Transponder and remote-key programming.
  • Ignition diagnosis, repair, or replacement.

Modern vehicles commonly use immobilizer systems, encrypted remotes, proximity keys, and onboard programming procedures. The correct solution depends on the make, model, year, VIN, key type, and security system. A basic metal duplicate is not equivalent to a programmed transponder key.

Vehicle-safe entry may involve an air wedge, long-reach tool, specialized picks, or manufacturer-specific procedures. The technician should avoid damaging weather seals, wiring, side-curtain airbags, window regulators, and painted trim. Ownership or lawful possession must be verified through identification, registration, title, rental documentation, or another appropriate record.

If the key turns but the engine does not start, the problem may involve the immobilizer, ignition switch, battery, starter circuit, or a failed transponder rather than the lock itself. Accurate diagnosis prevents paying for an unnecessary ignition replacement.

Commercial Locks, Doors, and Access Control

Offices, retailers, property managers, medical practices, and warehouses often need more than a single cylinder change. Commercial locksmith services can include:

  • Installation, repair, and replacement of commercial locks.
  • Door closers, exit devices, panic hardware, hinges, and strike plates.
  • Master-key systems for authorized staff, tenants, and restricted rooms.
  • Keypad, electronic, and access-control hardware.
  • Rekeying after employee turnover or lost business keys.
  • Repairs following broken entrance hardware or a forced entry.

A master-key plan should follow least-privilege access. Employees may need access to common areas, while managers or facilities staff may require additional doors. Sensitive rooms—such as server closets, records rooms, cash offices, or medication storage—should not automatically share the same key hierarchy.

New leases and office relocations are logical points for a security review. A locksmith may need to inspect the door, frame, lock type, fire-rating requirements, existing access-control panel, power supply, and egress hardware before recommending work. Changes to exit devices or fire doors must not obstruct emergency escape and may require coordination with building management or the authority having jurisdiction.

For larger systems, ask about credential management, audit logs, fail-safe versus fail-secure behavior, battery backup, and a documented process for deleting former employees’ credentials.

Pricing, Verification, and Choosing a Locksmith in DC

A locksmith invoice may include a service-call or travel charge, labor, hardware, emergency or after-hours pricing, key cutting, programming, and tax. Typical U.S. benchmarks vary widely, but a straightforward daytime lockout may fall around $75–$150, while complex residential, automotive, commercial, or after-hours work can reach $150–$400 or more. High-security hardware, restricted vehicle keys, drilling, access-control components, and urgent holiday calls can increase the total substantially.

Vehicle key programming commonly costs more than a basic duplicate because it may require specialized diagnostic equipment and a security credential. Commercial work is similarly variable because a door survey, hardware replacement, code compliance, or multi-door rekey can take considerably longer than a single lockout.

Before authorizing work:

  • Request a written or clearly stated estimate.
  • Confirm whether travel, labor, parts, programming, drilling, and emergency fees are included.
  • Ask what could cause the estimate to change.
  • Verify the company name, service area, and technician identity.
  • Be prepared to show proof of ownership, tenancy, employment, or vehicle authorization.
  • Avoid providers advertising an unrealistically low service fee that changes sharply on arrival.

Local conditions matter. District traffic and limited curb access can affect response logistics, while older rowhouses and apartment buildings may contain mortise, rim, or restricted hardware that requires additional assessment. A credible technician will explain those constraints rather than conceal them.

When calling, have the service category and location ready: home lockout, automotive key programming, commercial rekey, or door-hardware repair. Include the neighborhood, building access instructions, vehicle make and year, and whether anyone is in danger. That information helps the dispatcher send the appropriate equipment and technician.


A Sterling Kitchen Remodel Planned Around the Way You Live
Posted in

A Sterling Kitchen Remodel Planned Around the Way You Live

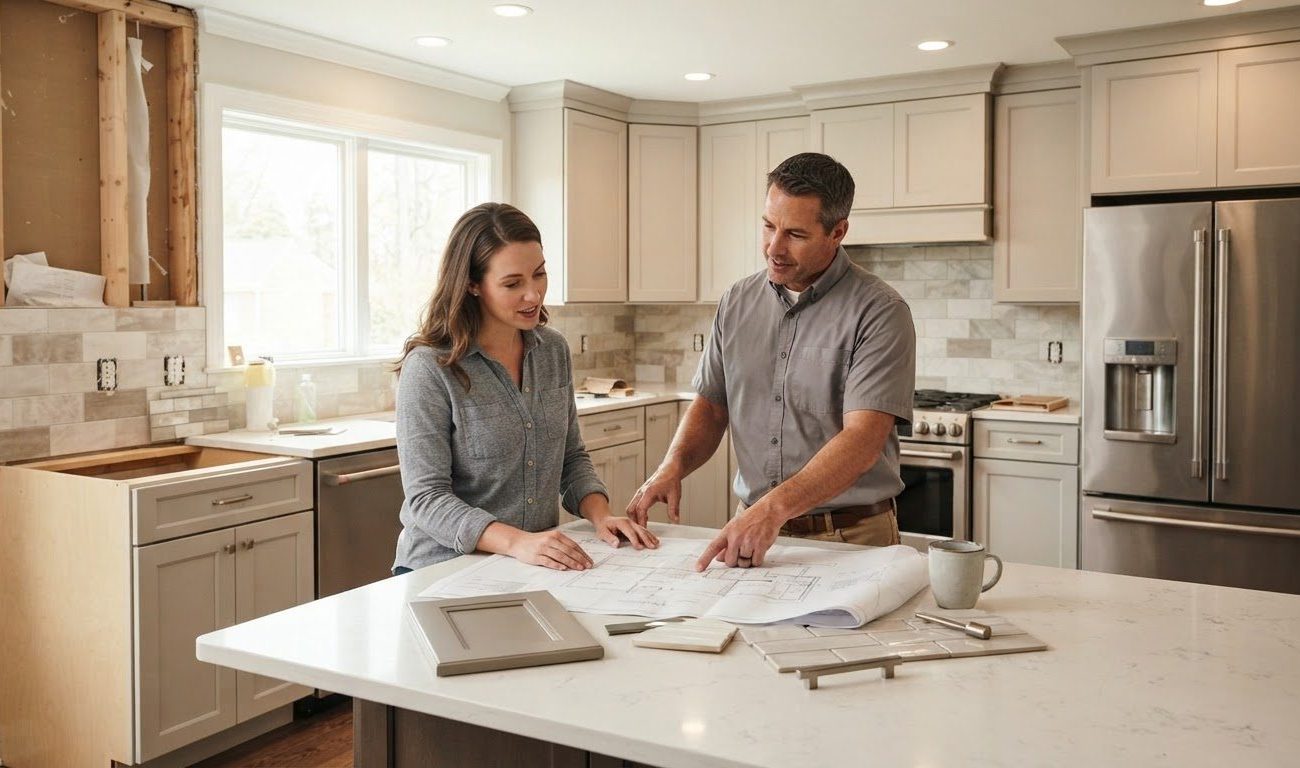
A kitchen remodel in Sterling often begins with a familiar frustration: a closed-off room, a traffic pattern that interrupts every meal, or cabinets that cannot accommodate the way the household actually cooks. The right solution is not necessarily the largest island or most expensive finish. It is a plan that improves movement, storage, lighting, and long-term usability.

When homeowners search for a Kitchen Remodeler Near Me, they are usually looking for more than a cabinet installer. They need a team that can evaluate the existing structure, coordinate plumbing and electrical work, explain costs, and manage construction locally.

That process can begin with inspiration images, a rough wish list, or no design direction at all. WellCraft Kitchen and Bath serves Sterling and surrounding Northern Virginia communities with a design-build approach, giving homeowners a starting point for discussing what the room must accomplish.

Start With the Kitchen You Actually Need

Before selecting cabinet colors, identify the kitchen’s operational problems. Sterling-area homes may have layouts designed for older cooking habits, limited pantry storage, narrow work aisles, or a dining area separated from the preparation space. A remodel should connect the design to:

  • Daily cooking routines and appliance locations
  • Entertaining patterns and guest circulation
  • Storage for cookware, small appliances, and pantry goods
  • Seating requirements and island clearance
  • Accessibility, resale considerations, and future household needs

A cosmetic refresh might retain the footprint while replacing cabinet fronts, hardware, countertops, paint, lighting, or appliances. A full remodel may relocate cabinetry, remove or add walls, alter plumbing or gas lines, upgrade electrical circuits, and require permits and inspections. Keeping the existing footprint usually reduces complexity; moving utilities or changing structural elements increases design coordination and cost.

What a Full Kitchen Remodel Can Include

A complete scope typically combines several trades and decisions:

  • Space planning: Layout revisions, work zones, aisle widths, island proportions, and traffic control.
  • Cabinetry: Stock, semi-custom, or custom cabinets; drawer bases; pull-outs; pantry systems; tray dividers; and concealed waste storage.
  • Surfaces: Countertops, backsplash tile, flooring, edge profiles, grout, and transitions to adjacent rooms.
  • Fixtures and appliances: Sinks, faucets, dishwashers, refrigerators, ranges, ventilation, and water-line connections.
  • Lighting: Ambient ceiling fixtures, task lighting under cabinets, decorative pendants, and dedicated appliance or pantry illumination.
  • Infrastructure: New circuits, outlets, lighting controls, plumbing supply and drain changes, gas piping, and range-hood ducting where applicable.
  • Construction: Demolition, dust protection, debris removal, drywall repair, trim, finish carpentry, painting, and final corrections.

Practical planning matters. An island should preserve comfortable clearances around doors and appliances rather than simply fill available floor area. Drawer access is often more useful than deep lower-cabinet shelving. A pantry should be located where groceries enter the kitchen, and the refrigerator, sink, and cooktop should support an efficient work sequence without forcing people through the primary preparation zone.

A design-build company coordinates these decisions under one scope. Hiring a separate designer, cabinet supplier, countertop fabricator, electrician, plumber, and general contractor may work, but it places more responsibility on the homeowner to resolve measurement errors, scheduling conflicts, and warranty questions.

Budget, Permits, and Decisions That Change the Scope

A meaningful update can sometimes be completed for roughly $15,000 to $30,000 when the layout remains intact and materials are controlled. A full Sterling kitchen remodel commonly falls around $40,000 to $90,000 or more, depending on cabinetry, appliances, surfaces, structural work, and finish level. These are planning ranges, not bids.

Cabinetry and layout changes usually have the greatest financial effect. Moving a sink, range, or dishwasher can require new rough plumbing, electrical circuits, gas piping, flooring repairs, and wall finishes. Premium appliances, imported tile, specialty hardware, and elaborate stone fabrication can increase cost without necessarily improving daily function.

An itemized estimate should distinguish:

  • Cabinetry and installation
  • Countertops, backsplash, and flooring
  • Appliances, sinks, and faucets
  • Plumbing, electrical, gas, and HVAC work
  • Demolition, disposal, permits, and inspections
  • Labor, allowances, taxes, and project management

In Loudoun County, permits and inspections are commonly relevant when walls, electrical systems, plumbing, gas, or structural components change. The responsible remodeling team should identify the applicable building, electrical, plumbing, and mechanical requirements and clarify who submits applications and schedules inspections.

Written change orders are equally important. If concealed water damage, outdated wiring, or an undersized gas line is discovered after demolition, the revised work should identify the added cost, schedule effect, and approval requirement before proceeding.

Ask before approving an estimate:

  • Who handles permits and inspections?
  • Which work is performed by employees, and which is subcontracted?
  • What does installation include?
  • How are lead times, substitutions, and discontinued products handled?
  • What happens if concealed damage is discovered?

What the Remodeling Experience Looks Like Week by Week

A well-managed project generally follows this sequence:

  1. Consultation and goals: Discuss problems, budget parameters, cooking habits, and desired improvements.
  2. Measurements and discovery: Verify room dimensions, wall conditions, utility locations, windows, doors, and potential structural constraints.
  3. Layout development: Review plan options, elevations, cabinet configurations, appliance clearances, and lighting concepts.
  4. Selections: Finalize cabinets, countertops, tile, flooring, fixtures, appliances, hardware, paint, and lighting.
  5. Scope and approvals: Complete the itemized estimate, contract, payment schedule, permits, and documented change procedures.
  6. Ordering and scheduling: Release materials, confirm lead times, and coordinate the construction calendar.
  7. Demolition and preparation: Isolate the work zone, remove existing finishes, protect adjacent areas, and inspect concealed conditions.
  8. Rough-in work: Complete plumbing, electrical, gas, ventilation, and inspections before walls and finishes are closed.
  9. Installation: Set cabinets, template and install countertops, complete tile and flooring, and install fixtures.
  10. Closeout: Finish trim and paint, correct deficiencies, complete the punch list, and conduct a final walkthrough.

Construction generally begins after selections are finalized and major materials are available. Cabinet and countertop lead times can affect the schedule, while specialty appliances or custom components may require additional coordination.

Homeowners can often remain in the house, but they should establish a temporary kitchen with a microwave, electric kettle, compact refrigerator, and accessible water source. Dust barriers, floor protection, safe paths through the home, and daily cleanup reduce disruption. Even with strong containment, noise, limited cooking capacity, and several weeks of inconvenience are realistic.

Communication should include regular progress updates, prompt answers to questions, written changes, notice of inspection results, and a punch list that is actively closed rather than left indefinitely.

Choosing a Kitchen Remodeler Near Sterling

Local proximity is useful only when it is paired with accountability. A Sterling-based remodeling team may understand common Northern Virginia housing layouts, Loudoun County permitting procedures, regional weather considerations, and the practical limits of working in occupied homes. It is also easier to arrange site visits and address service questions after completion.

Evaluate a prospective remodeler by checking:

  • Physical business presence and service area
  • Licensing, insurance, and permit practices
  • References and independent reviews
  • Completed kitchens with comparable layouts
  • Written scope, allowances, exclusions, and payment schedule
  • Warranty terms and post-completion procedures

Look beyond photography. Ask whether the completed kitchens have sensible work zones, adequate drawer access, properly scaled islands, layered lighting, and clean transitions to adjacent rooms. A visually impressive project can still perform poorly if the refrigerator blocks a walkway or the range lacks effective ventilation.

During consultation, ask who supervises the jobsite, which subcontractors are involved, how material delays are handled, how often updates are provided, and who has authority to approve field decisions. A showroom can also help homeowners evaluate cabinet construction, hardware, countertop edges, tile texture, and lighting rather than relying solely on samples.

Kitchen Remodeling Questions Sterling Homeowners Ask

How much does a kitchen remodel cost?

Cost depends on layout changes, cabinetry, appliances, surfaces, structural work, and finish level. Request a project-specific, itemized estimate instead of relying on a generic online average. A limited refresh may cost substantially less than relocating walls and utilities.

Do kitchen remodels require permits?

Moving walls, plumbing, gas, or electrical systems commonly triggers permit and inspection requirements. The remodeling team should explain which permits apply and manage the process when that service is included in the contract.

Can I stay in my home during construction?

Many homeowners do, but plan for a temporary kitchen, dust barriers, noise, restricted water access, and several weeks without normal meal preparation. Keep children and pets separated from the construction zone.

How soon can a remodel begin?

Design services may begin before construction. On-site work depends on finalized selections, permit approvals, material arrival, and crew scheduling. “Starting the design” and “starting demolition” are different milestones.

What other remodeling work can a kitchen company handle?

Some kitchen specialists also provide bathroom remodeling, basements, additions, custom closets, or outdoor living improvements. Confirm that each service uses the same clear scope, supervision, payment terms, and communication process.


What to Know Before Scoping a Sewer Line in Huntington Beach
Posted in

What to Know Before Scoping a Sewer Line in Huntington Beach

A recurring sewer backup is rarely solved by guesswork. If a drain clears temporarily and then fails again, the obstruction may be only one symptom of a damaged, shifted, root-invaded, or sagging sewer lateral.

The phrase Sewer camera inspection Huntington Beach generally refers to using a waterproof, push-camera system to examine the private sewer line serving a home. Unlike a basic drain clearing, the inspection is intended to show the pipe’s condition, identify a defect, and help locate it underground.

Before authorizing excavation, hydro-jetting, or replacement, homeowners should understand what the camera can prove, what it cannot, and what documentation they will receive. Plumbing by Tony handles sewer lines and related plumbing work with upfront estimates, which makes it reasonable to ask for a clearly defined inspection scope before work begins.

When a Sewer Camera Inspection Is Worth Scheduling

A camera inspection is especially useful when symptoms point beyond an isolated fixture clog:

  • Backups return after snaking or drain cleaning.
  • Several fixtures become slow at the same time.
  • Toilets gurgle when a sink, shower, or washing machine drains.
  • Sewer odors persist, or sewage appears in a yard or cleanout.
  • Wet, unusually green, or sunken patches develop along the presumed sewer route.
  • A repair or replacement recommendation needs independent verification.

Older Huntington Beach properties may have clay, cast-iron, or other aging lateral materials, and established landscaping can increase the possibility of root intrusion at joints or cracks. That does not mean every older home needs an annual scope. However, a proactive inspection can be sensible when the line has an unknown maintenance history or before buying a property.

A sewer scope is also valuable before opening a floor, driveway, patio, or landscaped area. Visual evidence can help distinguish a localized defect from a line-wide problem and may prevent unnecessary demolition.

For a purchase, request a dedicated sewer scope rather than assuming it is included in a standard home inspection. For a sale, documentation of the lateral’s condition can reduce uncertainty during escrow and clarify whether a recommended repair is supported by evidence.

What the Camera Can Reveal Inside the Line

A drain machine restores flow; a sewer camera helps explain why flow was restricted. A qualified technician typically advances a camera head attached to a flexible push rod through an accessible cleanout and watches the pipe interior on a monitor.

Common findings include:

  • Tree roots entering through joints, cracks, or failed connections.
  • Cracked, broken, shifted, or collapsed pipe sections.
  • A belly, or sag, where wastewater and sediment repeatedly collect.
  • Grease, mineral scale, sludge, and other heavy buildup.
  • Corrosion inside older metal piping.
  • Foreign objects or obstructions that prevent the camera from reaching the entire line.

Many camera systems include a sonde—a small radio transmitter near the camera head. With an electronic locator, the technician can mark a defect’s approximate horizontal position and depth. That information is useful when planning a spot repair or determining where excavation would occur.

The inspection also has limits. It may not establish whether a defect is on the city side or the homeowner’s side of the connection. That determination can require property records, easements, agency standards, and a review of the public right-of-way. A camera cannot see beyond a collapsed section, inaccessible branch, severe blockage, or missing cleanout. Nor does footage alone always determine whether a pipe should be repaired, lined, or replaced; structural condition, access, permits, and local requirements also matter.

How a Huntington Beach Sewer Camera Inspection Is Performed

A typical residential workflow is straightforward:

  1. The technician locates and opens a cleanout or another suitable access point.
  2. The line is assessed to determine whether roots, grease, or standing water require preliminary clearing.
  3. A waterproof camera is advanced through the sewer lateral.
  4. Live footage is reviewed, with notable defects documented by distance from the access point.
  5. If needed, the camera is located from the surface to estimate defect position and depth.
  6. The technician explains findings and outlines appropriate next steps.

Many residential inspections take approximately 30–60 minutes. Longer laterals, difficult access, heavy blockage, or added cleaning can extend the appointment. A collapsed section may prevent a full inspection rather than simply making it slower.

Homeowners can prepare by:

  • Identifying cleanouts if their locations are known.
  • Reporting recent backups, drain cleanings, remodels, or recurring symptoms.
  • Clearing stored items, soil, or landscaping from access areas.
  • Asking whether video, still images, or written findings are included.
  • Confirming whether locating and cleaning are separate charges.

Huntington Beach’s coastal environment does not automatically cause sewer failures, but aging infrastructure, shifting soil, landscaping, and long-established neighborhoods can all affect residential laterals. The relevant evidence is the condition of the specific line, not the home’s age alone.

Understanding Inspection Pricing and Repair Recommendations

There is no reliable single price for every sewer camera inspection. A practical Orange County benchmark is often about $150–$500 for a basic inspection, with higher totals possible when access is difficult, cleaning is required, locating is added, or detailed reporting is requested. Emergency scheduling and unusually long lines can also affect pricing.

Ask for an estimate that separates:

  • Camera inspection.
  • Drain cleaning or hydro-jetting.
  • Electronic locating.
  • Video or written reporting.
  • Any repair or excavation.

A low advertised starting price may cover only a short, accessible inspection. It may not include clearing a root obstruction, opening a buried cleanout, or producing transaction-ready documentation.

Footage can help differentiate among several responses:

  • Routine cleaning or hydro-jetting: Appropriate when the pipe is structurally sound but obstructed by roots, grease, or scale.
  • Spot repair: Useful for a localized crack, offset, or failed joint with otherwise serviceable pipe.
  • Trenchless rehabilitation: Lining or pipe-bursting may reduce surface disruption, but suitability depends on diameter, alignment, access, and structural condition.
  • Conventional excavation: May be necessary for a deep, collapsed, severely misaligned, or inaccessible section.
  • Full replacement: Considered when damage is extensive or the remaining pipe has reached the end of its practical service life.

Before approving major work, ask:

  • Where exactly is the defect, and how was it located?
  • Is the pipe structurally damaged or merely obstructed?
  • Can I review and retain the footage?
  • What alternatives are available, and what conditions make each suitable?
  • Does the proposal address the entire problem or only the current blockage?

Technicians and companies should also be able to explain applicable California licensing, permitting, and safety requirements. OSHA practices matter when excavation or confined-space hazards are involved; homeowners should not enter sewer pits, trenches, or manholes.

Questions Huntington Beach Homeowners Commonly Ask

How long does a sewer camera inspection take?

Most residential visits take about 30–60 minutes, including a basic findings review. Access problems, blockage, line length, cleaning, or locating can extend the appointment.

Do I need the sewer line cleaned before the camera inspection?

Not always. A clear line may be inspected immediately. Roots, grease, sediment, or standing debris can obscure the lens, however, so cleaning may be needed for a reliable view. Ask whether that work is included or billed separately.

Can an inspection find tree roots, pipe collapse, or a sewer-line belly?

Yes, these are common camera findings when the camera can reach the affected area and visibility is adequate. A belly is typically identified by standing water and a low section where debris accumulates. The camera may not pass a complete collapse or severe obstruction.

Should I get a sewer scope when buying a Huntington Beach home?

It is worth considering, particularly for an older property, a home with mature trees, or a line with no documented inspection history. Standard home inspections may not include sewer scoping. A dedicated inspection can reveal a hidden expense before closing and provide evidence for negotiations.

Will I receive video or a written report?

Deliverables vary. Confirm before booking whether you will receive a recording, still images, measurements, a written summary, or all four. Documentation is especially important for a real-estate transaction, insurance file, or comparison between repair proposals.

Does the inspection determine whether the city or homeowner is responsible?

It can identify the affected section and provide useful distance and locating information, but it usually does not decide legal or administrative responsibility by itself. Property lines, easements, connection points, local records, and agency requirements may need to be reviewed.

A sewer camera inspection is most valuable when it turns an assumption into a documented diagnosis. Whether the result is “clean the line,” “repair one section,” or “plan a larger replacement,” homeowners gain a clearer basis for deciding what work—and what cost—is actually justified.


Recovering Your Home After a Flood: A Practical Restoration Guide
Posted in

Recovering Your Home After a Flood: A Practical Restoration Guide

A flooded home can look deceptively manageable: a damp floor, stained drywall, and a few wet boxes. Yet water can travel behind walls, under flooring, and into electrical assemblies within hours. The safest recovery plan begins with hazard control, not cosmetic cleanup.

Flood Restoration involves much more than pumping out visible water. It includes inspection, extraction, contamination control, structural drying, contents handling, cleaning, and—when necessary—reconstruction. The objective is to return the property to a dry, sanitary, and safely occupiable condition.

For local homeowners, Restoration Logistics Boulder can be part of the evaluation process when a loss requires coordinated mitigation and repairs. Keep the focus on documentation, moisture verification, and a clearly defined scope rather than choosing a contractor solely by response time or advertising.

What Floodwater Can Do to a Property

Standing water saturates carpet, pad, hardwood, laminate, subflooring, drywall, insulation, cabinets, and personal belongings. Porous materials can wick water upward and sideways, while particleboard cabinetry and engineered flooring may swell or delaminate. Wood framing can absorb moisture and eventually deteriorate if it remains wet.

Electrical systems require particular caution. Water may reach receptacles, wiring, appliances, furnaces, and service equipment. Do not re-energize affected circuits until a qualified electrician or utility professional has assessed them.

Water is commonly classified by contamination level:

  • Clean water: Water from a broken supply line or similar source, although it can become contaminated if it remains stagnant.
  • Contaminated water: Water carrying chemicals, microbes, or other hazards, such as runoff or water from an appliance drain.
  • Sewage-affected water: Water containing sewage or significant biological contamination. Porous materials exposed to it often require removal rather than ordinary cleaning.

Clear-looking water is not necessarily safe. Floodwater can contain bacteria, solvents, pesticides, metals, or pathogens. Secondary risks include mold growth, musty odors, weakened framing, corrosion, and poor indoor air quality. Mold can begin developing on damp organic materials within roughly 24 to 48 hours, depending on temperature and humidity.

Immediate Actions Before Restoration Begins

Leave areas with rising water, unstable ceilings, visible structural movement, gas odors, or sparking equipment. Never walk through water near electrical devices. If you smell gas, leave immediately and contact the utility or emergency services from a safe location.

If the electrical panel is dry, accessible, and outside the flooded area, an adult may shut off the main breaker. Do not touch the panel while standing in water or if the equipment is wet. A professional should handle flooded panels, gas appliances, damaged wiring, and complicated shutoffs. Stop the water source only when it can be done without entering a hazard.

Before moving items, photograph and record:

  • Each affected room from multiple angles.
  • Water lines, damaged materials, appliances, and contents.
  • Serial numbers, receipts, and discarded items when possible.

Avoid handling sewage-soaked materials without appropriate gloves, eye protection, protective clothing, and respiratory controls. Do not disturb suspected asbestos-containing insulation, resilient flooring, pipe insulation, or textured materials in older homes; testing and regulated removal may be required. OSHA requirements and applicable Colorado rules may govern hazardous cleanup.

Temporary measures can include placing foil or plastic under furniture legs, moving dry belongings to a safe area, and covering roof damage from the exterior only if conditions are safe. Do not seal wet cavities or delay assessment while attempting extensive demolition.

The Flood Restoration Process From Assessment to Drying

A professional assessment begins with identifying the source, water category, affected rooms, likely migration paths, and safety hazards. Technicians may use moisture meters, thermal imaging, hygrometers, and documentation software to create a moisture map. The restoration plan should state what will be removed, what can be dried in place, how contamination will be controlled, and how completion will be verified.

Extraction typically uses submersible pumps, truck-mounted or portable extractors, wet vacuums, and weighted extraction tools. Removing bulk water quickly reduces material exposure and makes controlled drying possible. Unsalvageable drywall, insulation, pad, swollen composite materials, and contaminated porous items may be removed using containment and dust-control procedures.

Structural drying combines:

  • Air movers to increase evaporation at wet surfaces.
  • Dehumidifiers to remove moisture from the air.
  • Air filtration devices when airborne dust, spores, or contaminants require control.
  • Moisture monitoring to track drying in subfloors, framing, wall cavities, and other concealed areas.

Surface appearance is not proof of dryness. A dry carpet may conceal a wet pad or subfloor, and painted drywall may feel normal while its backside remains saturated. Technicians should compare readings with unaffected materials and document progress. In Boulder’s variable climate, outdoor temperature and humidity can change drying performance substantially; equipment settings must be adjusted rather than assumed.

Cleaning, sanitizing, and deodorization depend on the water category and material. Restoration personnel should use appropriate disinfectants according to label directions and avoid simply masking odors with fragrance. Air scrubbers, controlled demolition, and source removal are often more effective than ozone or other aggressive treatments, particularly in occupied homes.

Contents and Belongings Restoration

Contents work generally follows a pack-out and inventory process:

  • Items are photographed, labeled, categorized, and moved to a clean work area or storage facility.
  • Furniture, textiles, documents, electronics, and household goods are assessed for salvageability.
  • Cleanable items are washed, HEPA-vacuumed, dried, deodorized, or treated using material-specific methods.
  • Damaged contents are documented before disposal whenever practical.

Documents may require freeze-drying or specialized vacuum drying. Electronics should be disconnected and evaluated by qualified technicians, not powered on to test them. Upholstered furniture, mattresses, food, cosmetics, and porous items exposed to sewage may be unsafe or uneconomical to salvage. Pack-out, specialty cleaning, and storage commonly add hundreds to several thousand dollars depending on volume.

Repairs, Mold Prevention, and Returning the Space to Use

Mitigation and reconstruction are different phases. Mitigation removes water and stabilizes the property; reconstruction replaces drywall, insulation, flooring, trim, cabinets, and finishes. A contractor should explain where emergency services end and repair work begins.

Hidden moisture must be addressed behind baseboards, beneath flooring, inside wall cavities, around HVAC systems, and under cabinets. Selective openings may be necessary to inspect cavities and allow drying. Rebuilding over wet materials traps moisture and can create concealed mold or rot.

Mold prevention depends on prompt extraction, controlled humidity, removal of contaminated porous materials, and verification that assemblies are dry. Visible mold, extensive growth, HVAC contamination, or occupants with health vulnerabilities may justify assessment by an environmental professional. Remediation should emphasize containment, negative air where appropriate, HEPA filtration, removal of affected materials, and post-cleaning verification—not merely spraying a surface.

Before occupancy, the final review should consider:

  • Moisture readings compared with unaffected areas.
  • Absence of persistent sewage or microbial odors.
  • Clean, intact surfaces and properly reinstalled building components.
  • Safe operation of electrical, plumbing, heating, and ventilation systems.
  • Completion of permits or inspections required for reconstruction.

Timing, Insurance, and Restoration Decisions

A small clean-water loss may be extracted in one day and dried in approximately three to five days. Contaminated losses, extensive contents, structural damage, or reconstruction can take several weeks or longer. Schedule depends on water category, affected area, materials, weather, access, permitting, labor, and hidden damage.

Costs vary widely. Limited extraction and drying may range from roughly $1,000 to $4,000. Larger losses involving demolition, containment, contents handling, and reconstruction can reach $10,000 to $50,000 or more. These are broad U.S. planning ranges, not quotes; local labor, material prices, deductible, and damage severity control the final amount.

Notify the insurer promptly and preserve photographs, inventories, receipts, hotel bills, emergency invoices, and written communications. Coverage depends on the policy, source of water, exclusions, deductible, and whether separate flood insurance applies. A standard homeowners policy often treats sudden interior plumbing failures differently from surface-water flooding, groundwater, sewer backup, or maintenance-related damage.

DIY cleanup may be reasonable for a small, recent clean-water spill affecting limited, nonporous materials—provided electricity is safe and the area can be dried completely. Professional restoration is the safer choice when water may be contaminated, has entered walls or flooring, exceeds roughly 10 square feet of affected mold, involves HVAC systems, or has caused structural or electrical damage.

Ask any contractor:

  • How quickly can you inspect, extract, and install drying equipment?
  • Which moisture meters and readings will document completion?
  • How will contaminated materials and sewage be contained and disposed of?
  • What is mitigation, and what is reconstruction?
  • Will you provide itemized estimates, photographs, drying logs, and change orders?
  • Do personnel follow OSHA, EPA, IICRC, or applicable state guidance?
  • Who coordinates electricians, plumbers, environmental specialists, permits, and repairs?

The most reliable flood recovery is measurable: hazards are controlled, water is removed, moisture is verified, contamination is managed, and repairs are completed only after the structure is ready.


How to Choose the Right Blinds Store Near You
Posted in

How to Choose the Right Blinds Store Near You

A window-treatment project can look simple until you compare fabric opacity, slat sizes, mounting depth, control systems, and installation requirements. The right local supplier should help you solve practical problems—glare, heat gain, privacy, insulation, and awkward window geometry—not merely sell a product.

Searchers comparing a Blinds store near me typically want convenience, but proximity is only one factor. A nearby showroom lets you inspect colors and textures in changing light, operate samples, compare inside- and outside-mount options, and discuss whether a window can accommodate cordless or motorized hardware.

Before requesting estimates, review the services offered by Supreme Shades & Drapes alongside other local providers. Look for clear information about consultations, measuring, installation, repairs, replacement parts, warranties, service areas, hours, appointments, reviews, and expected lead times.

What to Look for in a Local Blinds Store

Local choices generally fall into four categories:

  • Showrooms: Best for comparing full-size samples, fabrics, mechanisms, valances, cornices, and drapery hardware in person.
  • Home-improvement retailers: Often useful for inexpensive, in-stock products and quick replacement of standard-size blinds, although design and installation support may vary.
  • Online sellers: Typically offer broad catalogs and competitive prices, but you must evaluate samples, measure accurately, and coordinate installation independently or through a contractor.
  • Custom window-treatment specialists: Usually provide design consultation, professional field measurements, fabrication, installation, and post-installation adjustments.

A competent specialist should inspect window recesses, trim, handles, obstructions, sill depth, and nearby HVAC registers before recommending an inside mount. For an outside mount, the installer should verify overlap, headrail clearance, and wall or stud conditions. Ask whether the company uses trained installers, documents measurements, and provides a correction policy if a treatment does not fit.

Showroom proximity also makes follow-up easier. Confirm whether the business serves your neighborhood, requires appointments, carries physical samples, and handles repairs or replacement components after installation.

Blinds, Shades, and Window Coverings Available Nearby

The best product depends on the room, solar exposure, architecture, and desired control.

  • Wood blinds: Offer natural grain, adjustable daylight control, and a traditional appearance. They are attractive in living rooms and offices but are less suitable for persistent humidity.
  • Faux-wood blinds: Resist moisture better than natural wood and are practical in kitchens and bathrooms. They can be heavier, particularly in wide openings.
  • Metal blinds: Aluminum slats are durable, easy to clean, and appropriate for offices, rentals, kitchens, and contemporary interiors. Slat gauge and finish affect rigidity and appearance.
  • Roller shades: Provide a clean profile with light-filtering, room-darkening, or blackout fabrics. They work well where minimal visual bulk matters.
  • Solar shades: Use openness factors to balance outward visibility, glare reduction, and ultraviolet protection. Lower openness generally means greater glare and privacy control, but less view-through.
  • Cellular shades: Their honeycomb construction creates an insulating air pocket. They can reduce heat transfer and improve comfort, especially near cold glass or strongly sunlit windows.
  • Roman, woven-wood, and pleated shades: Add texture and softness. Woven woods introduce natural materials, while pleated shades suit modern spaces and specialty applications.
  • Vertical blinds and drapery: Remain practical for sliding doors, wide windows, and large expanses of glass. Drapery can add privacy, sound-softening texture, and a layered design effect.

Common upgrades include cordless operation, continuous-loop controls, rechargeable motorization, smart-home integration, blackout or privacy lining, top-down/bottom-up operation, valances, cornices, and decorative rods or tracks. Motorized systems cost more but can improve accessibility and allow scheduled solar control; verify battery access, charging requirements, and compatibility with the home’s control platform.

Choosing Blinds by Room and Everyday Need

Bedrooms

Prioritize blackout performance, privacy, quiet movement, and control placement. A blackout roller shade or cellular shade paired with side curtains can limit early-morning light. In bedrooms exposed to strong sun, UV-resistant fabrics help protect flooring and furniture.

Living Rooms

Balance daylight with glare reduction and views. Solar shades, light-filtering rollers, Roman shades, or layered blinds and drapery can protect upholstery without making the room permanently dark. Coordinate undertones—warm, cool, or neutral—rather than relying only on a small color chip.

Kitchens

Select easy-clean, moisture-tolerant materials with enough clearance from sinks, cooktops, and cabinet doors. Faux wood, aluminum, and washable roller fabrics are often more practical than delicate textiles. Check that cords and operating chains cannot contact appliances or interfere with food-preparation areas.

Bathrooms

Privacy and humidity resistance take priority. Faux wood, aluminum, moisture-rated roller shades, and suitable cellular products are safer choices than untreated natural wood or fabrics that retain moisture. Ventilation remains important: no window covering prevents condensation caused by inadequate exhaust.

Large Windows and Patio Doors

Compare vertical systems, sliding panels, linked roller shades, drapery, and motorization. Measure panel stacking space so the open treatment does not block the doorway or reduce usable glass. For heavy or frequently used coverings, verify track load ratings and secure attachment points.

Also consider child and pet safety, fading from south- or west-facing glass, insulation needs, unusually shaped windows, and whether a control can be reached without furniture or obstacles.

Custom Blinds Versus Ready-Made Options

Ready-made blinds make sense for standard-size windows, temporary housing, rental properties, or urgent replacements. They are generally faster and less expensive—often about $30 to $250 per window for basic products, excluding installation—but sizes, colors, materials, and control choices are limited. Fit may also be imperfect in older homes where openings are not square.

Custom coverings cost more but improve fit and selection. A typical professionally supplied and installed treatment may range from roughly $250 to $1,500 per window, while premium fabrics, large openings, motorization, specialty shapes, or layered drapery can exceed that range. Treat these as planning benchmarks, not fixed quotes.

Custom products are particularly valuable for bay windows, oversized openings, French doors, arched or angled windows, deep trim, and rooms requiring precise blackout or glare control. Accurate measurements must account for:

  • Inside versus outside mounting.
  • Window depth and headrail clearance.
  • Handle, crank, and lock interference.
  • Sill projection and trim dimensions.
  • Control location and child-safe routing.
  • Shade roll direction, fabric deductions, and door swing.

Request physical swatches. They reveal texture, opacity, color shift, and transparency under morning, afternoon, and artificial light. A fabric that appears neutral in a showroom may look noticeably warmer beside existing flooring or cooler against painted walls.

How to Get the Right Local Blinds Quote

Prepare rough dimensions, window photos, room priorities, preferred styles, and a realistic budget before contacting a store. Do not treat self-measurements as final unless the supplier specifically requires them; fabrication errors can result when measurements omit trim, depth, or obstructions.

Ask whether the quoted service includes consultation, samples, professional measurement, delivery, installation, haul-away, warranty support, and post-installation adjustment. Request an itemized written estimate separating:

  • Product and fabric.
  • Custom fabrication.
  • Motorization or other upgrades.
  • Delivery and installation.
  • Taxes and disposal fees.

Compare lead times for in-stock, custom, and motorized products. Ready-made items may be available within days, while custom treatments commonly require several weeks; fabric availability, holiday production schedules, and motor components can extend delivery.

Questions to Ask Before Ordering

  • Which treatment best matches each room’s light, moisture, privacy, and insulation requirements?
  • Are cordless, motorized, child-safe, or smart-home controls available?
  • Who performs the measurement and installation?
  • Which materials resist fading, warping, staining, and frequent cleaning?
  • What are the product, labor, and motorization warranties?
  • How are defects, incorrect measurements, delays, or damaged shipments handled?
  • Can the installer return for adjustments after the treatment is mounted?
  • Are repairs and replacement parts available locally?

A reliable blinds store should explain trade-offs rather than push one style for every room. Compare the technical fit, operating convenience, maintenance requirements, installation quality, and total delivered cost—not just the sticker price. That process produces window coverings that perform well long after the initial showroom visit.


Finding the Right Blinds Store Near You Starts With the Window
Posted in

Finding the Right Blinds Store Near You Starts With the Window

A window treatment that looks perfect in a showroom can disappoint once it meets a shallow frame, uneven trim, strong afternoon sun, or a frequently used door. The real challenge is not simply choosing a color. It is matching the product, mounting method, control style, and installation approach to the room.

A Blinds store near me should help you work through those decisions rather than treating every window as a standard rectangle. A useful consultation covers how the window operates, how much light and privacy you need, whether the treatment will sit inside or outside the frame, and how the finished product will be measured and installed.

Before ordering, clarify who measures, what happens if a measurement is incorrect, whether installation is included, and how warranty service works. Those questions matter whether you are comparing large retailers, online suppliers, or a local specialist such as The Blinds Source. Accurate information at the beginning prevents expensive surprises later.

Start With the Problem the Blinds Need to Solve

People often begin with product names—wood blinds, roller shades, shutters—before identifying the room’s actual requirements. Reverse that order. Consider the window’s exposure and the way the room is used.

For bedrooms and media rooms

Light control usually comes first. Room-darkening shades reduce incoming daylight, but the fabric or slat material is only part of the result. Light can still enter around the edges, especially with an inside mount. An outside mount or side-channel system may provide better coverage when darkness is a priority.

Cordless operation is also worth considering in rooms used by children or pets. Cordless designs reduce hanging cords, while motorized options are useful for tall, hard-to-reach windows.

For living rooms

The decision is often a balance between daylight, glare, privacy, and appearance. Light-filtering shades soften sunlight without making the room completely dark. Adjustable blinds allow more precise control, but their slats require regular dusting.

Large windows may need wider shade sections or multiple blinds. Ask how seams, headrails, and control placement will appear when several units sit side by side.

For kitchens and bathrooms

Humidity and cleaning are central concerns. Materials that tolerate moisture are generally more practical than untreated natural fibers in these rooms. Keep fabric and operating mechanisms away from sinks, stovetops, and areas where splashing is routine.

A window above a counter also needs enough clearance for the handle, faucet, or backsplash. A treatment that works in a bedroom may be awkward in a kitchen simply because it cannot be reached or raised comfortably.

For doors and unusually shaped windows

French doors, sliding doors, arches, angled tops, and narrow sidelights require more planning than standard windows. Check how the treatment will clear door handles and whether adjacent panels can open without colliding.

Shutters and custom shades can accommodate some specialty shapes, but not every product is suitable for every configuration. Provide photographs and rough dimensions before a consultation so the options can be narrowed efficiently.

Understand the Main Product Families

The terms used by retailers overlap, so compare the operating behavior and construction—not just the label.

Blinds

Blinds use horizontal or vertical slats that tilt to control light and visibility. Common materials include aluminum, vinyl, wood, and composite or faux-wood products.

  • Wood offers a natural appearance but requires more care around moisture.
  • Faux wood and composite materials are often selected for durability and easier cleaning.
  • Aluminum is lightweight and practical for narrow windows or utility spaces.
  • Vertical blinds remain useful for wide windows and sliding doors.

Blinds provide precise adjustment, but fully open slats still leave the window visually segmented. If a softer appearance is more important than directional control, shades may be a better fit.

Shades

Shades use a continuous material that raises, lowers, rolls, folds, or stacks. Roller shades have a clean profile and work well in modern interiors. Cellular shades add a structured layer of fabric and are often chosen when insulation is a concern. Roman shades create a more decorative look, though their folds require adequate stack space above the window.

Sheer, light-filtering, and room-darkening fabrics produce distinctly different results. Requesting samples is useful because fabric color and opacity change noticeably under daylight and artificial light.

Shutters

Shutters use hinged panels with adjustable louvers. They create a substantial, built-in appearance and are particularly suited to windows where durability and long service life matter. Their frame occupies more visual space than a simple roller shade, and the panel swing must be planned around furniture and walkways.

Drapery and layered treatments

Drapery adds softness and can improve coverage around the edges of a window. Pairing curtains with a shade gives separate control over privacy and daylight, but it requires enough wall width for the hardware and fabric stack.

Layering also affects measurement. The installer must account for trim, rods, handles, heating registers, and nearby cabinetry.

Decide Between an Inside and Outside Mount

Mounting position changes both appearance and performance.

An inside mount sits within the window opening. It produces a neat, recessed look and leaves surrounding trim visible. It requires sufficient depth and a reasonably square opening. Uneven frames can create gaps or make the treatment sit at an angle.

An outside mount attaches to the wall or window trim around the opening. It can make a window appear larger, cover unattractive trim, and reduce side gaps. However, it needs clear wall space above and beside the frame. Hinged windows, handles, alarms, and adjacent windows must be checked before selecting this option.

For a consistent appearance across several windows, outside mounting sometimes makes alignment easier. For deep, well-finished recesses, inside mounting may look cleaner. Neither approach is automatically superior.

Treat Measurement as a Design Decision

Incorrect measurements are among the most costly problems in custom window coverings. “Width by height” is not enough unless the measuring method is also defined.

A professional or experienced installer will typically consider:

  • The width at multiple points, since frames are not always perfectly square.
  • The opening height and available mounting depth.
  • Trim, sills, handles, locks, and crank operators.
  • Whether the window opens inward, outward, upward, or by sliding.
  • The space needed for a shade or blind when fully raised.
  • Gaps between neighboring windows and the position of nearby doors.

If you measure yourself, use a steel tape rather than a flexible fabric tape and record each dimension clearly. Do not round measurements unless the supplier specifically instructs you to do so. Also confirm whether the manufacturer wants the exact opening size or the finished blind size; those are not always the same.

For multiple windows, label every measurement by room and window position. A spreadsheet or simple diagram is safer than relying on memory.

Compare Quotes on Scope, Not Just Price

The cheapest initial figure is not necessarily the lowest total cost. Window-treatment quotes can differ because one includes measurement, delivery, installation, valances, upgraded hardware, or motorization while another covers the product only.

Request an itemized quote that identifies:

  • Product type, material, color, and operating system.
  • Finished dimensions or the measurement responsibility.
  • Mounting method and hardware.
  • Delivery timing and installation charges.
  • Removal or disposal of existing treatments.
  • Warranty coverage for the product, controls, and workmanship.
  • What happens if the product arrives damaged or does not fit.

Pricing varies with window size, material, customization, controls, and installation complexity, so a meaningful comparison requires matching the specifications. Ask whether taxes, travel charges, minimum service fees, or specialty-window surcharges apply before approving the order.

Check Controls, Child Safety, and Accessibility

Operating style affects everyday satisfaction more than many shoppers expect. A large shade that is frequently raised may be frustrating with a manual chain. A tall window may justify motorization, while a small, rarely used window may not.

Consider where controls will sit and whether furniture will block access. For motorized products, ask about power sources, charging, remotes, wall switches, app compatibility, and what happens during a power outage. Do not assume that products from different manufacturers will integrate with the same home-automation system.

Cordless and inaccessible-cord designs are especially relevant in homes with young children. Keep beds, cribs, and furniture away from operating cords, and follow current safety guidance for window coverings. A professional installation should leave controls secure and positioned for practical use.

What to Bring to a Consultation

Preparation makes a local appointment more productive. Bring or provide:

  • Photos showing the full wall, not just the window.
  • Approximate width and height for each opening.
  • Notes about morning or afternoon sun.
  • Examples of colors and furnishings already in the room.
  • Information about pets, children, or mobility needs.
  • A list of windows that must match.
  • Questions about cleaning, repairs, lead times, and warranty service.

Ask for physical samples whenever possible. A small swatch reveals texture and opacity, but also compare it against the wall, flooring, and upholstery at different times of day.

Questions to Ask Before Signing

A reputable window-treatment process should make responsibilities clear. Ask:

  1. Who takes the final measurements?
  2. Will the treatment be made to the opening or to specified finished dimensions?
  3. Is installation performed by employees or an outside installer?
  4. What surfaces and conditions are included in the installation?
  5. How are uneven windows or unexpected obstructions handled?
  6. What is covered if the product is damaged, defective, or incorrectly sized?
  7. How are service calls handled after installation?
  8. What maintenance does the material require?

Written answers are valuable because custom products may not be returnable in the same way as standard retail merchandise. Confirm the cancellation policy and approval process before production begins.

Make the Final Choice Room by Room

A whole-home order does not need to use one product everywhere. The best solution may be room-darkening shades in bedrooms, moisture-tolerant blinds in bathrooms, a layered treatment in the living room, and a durable panel system at a sliding door.

Consistency still matters. Matching colors, aligned headrails, and coordinated hardware can make different product types look intentional. The goal is not to select the same treatment for every opening; it is to create a plan that respects how each room works.


Professional Carpet Cleaning in Wimbledon Can Revive Carpets Affected by Stains, Odours and Everyday Wear
Posted in

Professional Carpet Cleaning in Wimbledon Can Revive Carpets Affected by Stains, Odours and Everyday Wear

Rented flats round Wimbledon get new tenants every year or two, and the carpet takes the brunt of it. Owner-occupied houses fare no better once a dog and a couple of children are involved. Professional carpet cleaning in Wimbledon brings tired pile back, dealing with the marks and the smell together.

Not every carpet wants the same treatment. One room needs a stain worked on, the next has an odour sitting down in the underlay, and the hall has simply gone grey through the middle. Professional carpet cleaning in Wimbledon works out which of those problems you have before anything gets decided.

What Wears a Carpet Down Round Here

Rentals Take the Hardest Hits: Tenants move out, somebody gives the floor a quick hoover, and the next lot move in on top of whatever was left behind. Two or three turnovers of that and the pile is packed solid. Landlords find out at check-out, usually during an argument about deductions.

Everyday Life Grinds It Down: Pavement grit arrives on shoes from the station and the school gates. Radiators bake dust into the fibre nearest the wall. Sun through a bay window fades the strip beside the sofa over a few summers, and none of it shows until the room gets cleaned.

Ten Minutes With the Carpet Before Any Machine

A Proper Look Changes the Plan: Fibre first, then the backing, then how much old detergent is still sitting in there from earlier attempts. Carpets shampooed badly hold residue that pulls dirt back in within weeks. Knowing that in advance changes the rinse, the dwell time and how wet the pile gets.

Every Room Gets Rated Separately: A spare bedroom used twice a year does not need what the hall needs. Traffic lanes get worked over twice, quieter rooms get a lighter pass, and a wool runner on the stairs is handled with far more care than the synthetic in the lounge.

Stains, Smells and Deep Cleaning Are Three Different Jobs

A Mark and a Smell Live in Different Places: Stains sit up in the fibre where you can see them. Odour lives further down, in the backing or the underlay, and a surface clean only masks that for a fortnight. Enzyme treatment goes after the source instead of covering it over.

Order of Work Matters More Than People Expect: Spot treatment happens first, before any general cleaning, because hot extraction can fix a mark that was left untouched. Odour work needs its own dwell time before that. Deep cleaning comes last and pulls the lot out, including the residue left by earlier bottles.

Signs It Has Gone Past DIY:

  • Marks that come back within days of drying.
  • A smell that returns whenever the heating goes on.
  • Traffic lanes darker than the carpet under the furniture.
  • Pile that feels stiff or crunchy underfoot.
  • Two or three shop-bought treatments already tried on the same spot.

Frequently Asked Questions

Will one clean stop a smell that keeps coming back?

Depends where the odour sits. Surface smells from spills clear with a single deep clean. Anything that has soaked into the underlay needs enzyme treatment applied to the affected area, and severe cases need the underlay replacing, since no amount of cleaning above it reaches the source.

How much can a badly worn carpet improve?

Cleaning removes soil, so colour and texture improve noticeably. Physical wear does not come back, and neither do fibres already flattened or split by years of traffic. A tired carpet looks considerably better after a deep clean, though it stops short of looking new again.

Is a deep clean worth it before a tenancy ends?

Agents check carpets closely at check-out, and cleaning costs are a common deduction from deposits. A professional clean with a receipt gives you something to show the agent. Book it after the furniture goes, not before, so the whole floor gets covered properly.

Rooms That Feel Looked After Again

Carpets get written off far too early in this part of London. Most of them respond well once somebody works out what is wrong with them, treats the marks separately and gets the moisture right. Book an assessment for the rooms that bother you most and see what comes back.


What Is Included in a Professional Move-In Cleaning Service?
Posted in

What Is Included in a Professional Move-In Cleaning Service?

An empty home looks clean. Most of the time, it is not. Someone else cooked in that kitchen for years. Someone else showered in that bathroom, touched every light switch, and left grease, dust, and soap film in places a quick landlord wipe-down never reaches. A professional move-in cleaning exists to erase that history before your boxes ever cross the threshold.

What the service covers depends on the company you hire, the size of the property, and the condition the last occupants left behind. A lightly used one-bedroom apartment is one job. A family home that sat vacant through a dusty summer is a very different one. Take Clearwater Cleaning in San Diego as an example. Their move in cleaning covers cabinet interiors, appliances, walls, baseboards, and high-touch surfaces, which is a fairly standard scope for this type of service.

This guide walks through what most companies include room by room, what usually counts as an add-on, and what almost never comes standard. Read it before you book. It could save you an awkward phone call later, or worse, a first night spent scrubbing someone else’s bathtub.

Deep Cleaning of Kitchens and Appliances

Kitchens take the longest, and for good reason. Grease travels. It settles on cabinet doors and backsplash tile in a thin film you cannot see until you drag a damp cloth across it and look at the cloth. A move-in crew works the room from top to bottom, usually in this order:

• Countertops, sinks, faucets, and backsplashes scrubbed and sanitized

• Cabinet and drawer exteriors wiped down, with interiors included in most move-in packages

• Stovetops and range hoods degreased, burner grates soaked and cleaned

• Microwave, dishwasher, and other accessible appliances cleaned inside and out, depending on the package

One thing worth checking before you book. Refrigerator and oven interiors are standard with some companies and priced as extras with others. Ask directly. The answer varies more than you would expect, even between providers in the same city.

Thorough Bathroom Cleaning and Sanitizing

Bathrooms are where previous occupants leave the most behind, and where new residents are, perhaps fairly, the most squeamish. Nobody wants to inherit a stranger’s soap scum. Professionals treat this room as a full sanitizing job rather than a quick wipe-down.

• Toilets scrubbed and disinfected, including the base, the hinges, and behind the bowl

• Showers and bathtubs cleared of soap residue, mildew stains, and hard water spots

• Sinks, countertops, and accessible cabinets cleaned inside and out

• Mirrors and fixtures polished until they actually reflect something

Grout usually gets attention here too. Light discoloration often lifts with proper scrubbing. Deep-set staining may not, and an honest cleaner will say so upfront instead of promising a miracle. Fixtures with heavy mineral crust sometimes need a second visit.

Cleaning Bedrooms and Living Areas

These rooms look easy. They are not, exactly. Dust collects along baseboards, on ceiling fan blades, inside window tracks, and on top of door frames, the spots people forget exist until sunlight hits them at the wrong angle on moving day.

• Dusting of shelves, light fixtures, ceiling fans, and blinds

• Vacuuming carpets, with attention to edges and corners where debris gathers

• Mopping and spot-cleaning of hard floors

• Wiping doors, handles, baseboards, windowsills, and switch plates

Empty rooms make this work faster and far more complete. With no furniture in the way, cleaners reach areas that stay hidden for years in an occupied home. That is also why booking the service before the moving truck arrives matters so much.

What Additional Tasks May Be Included?

Beyond the core rooms, most companies offer add-ons. Some fold a few of these into their standard move-in package. Others price every single one separately, which is neither good nor bad, just something to know before comparing quotes. Larger homes tend to see more of these offered as bundles.

• Interior window and window track cleaning

• Refrigerator or oven interior detailing

• Inside closets, pantries, and built-in storage

• Garage sweeping, patio cleanup, or wall washing as optional extras

Confirm exactly what your quote includes before anyone shows up. Two quotes that look identical on price can differ by three or four tasks. The cheaper one is not always the better deal, and reading the checklist takes five minutes.

What Is Usually Not Included in a Move-In Cleaning?

This is the part people skip, then regret. A move-in cleaning is detailed work, but it is still a cleaning service, not a restoration crew. Knowing where that line sits keeps expectations realistic on both sides. Certain jobs sit outside the scope almost everywhere:

• Hauling junk, furniture, or construction debris

• Exterior window washing or anything requiring tall ladders

• Mold remediation, pest cleanup, or other hazardous work

• Carpet shampooing and deep stain removal, which usually need specialty equipment

If your new home needs any of these, say so when you call. Some companies partner with specialists or handle the task at an added rate. Springing it on the crew at the door rarely ends well for anyone.

A Clean Slate Before the First Box Arrives

A professional move-in cleaning comes down to one promise. Every surface you will touch, cook on, or bathe in gets scrubbed and sanitized before you live there. Kitchens, bathrooms, floors, and the forgotten corners in between.

Before booking, ask for the written checklist and walk through it against your own home. If you are settling into San Diego, Clearwater Cleaning offers move-in packages that cover the essentials listed here, and their team will tell you plainly what falls outside the scope. Wherever you land, that kind of straight answer is the real thing to look for.

Frequently Asked Questions

1. What is typically included in a professional move-in cleaning?

Most services cover kitchens, bathrooms, bedrooms, and living areas. Expect scrubbed counters and sinks, sanitized toilets and tubs, dusted surfaces, vacuumed carpets, mopped floors, and wiped baseboards, doors, and switches. Scope varies by company, so always request the checklist.

2. Does move-in cleaning include cleaning inside cabinets and appliances?

Usually, yes, since the home is empty. Cabinet and drawer interiors are standard with most providers. Refrigerator and oven interiors are sometimes standard and sometimes add-ons, so confirm before booking rather than assuming.

3. How long does a move-in cleaning service take?

Anywhere from three to eight hours. A small apartment in decent shape sits at the low end. A large house with years of buildup can run a full day. Crew size and home condition move the number more than square footage alone.

4. Should a home be empty before a move-in cleaning?

Empty is best. Cleaners reach baseboards, closets, and floors without working around boxes or furniture, and the job goes faster. If your belongings arrive early, keep them stacked in one room so the rest stays clear.

5. What is the difference between move-in cleaning and regular house cleaning?

Depth. Regular cleaning maintains a home someone already lives in. Move-in cleaning digs into cabinet interiors, appliance interiors, baseboards, and buildup left by previous occupants, which makes it closer to a deep clean of an empty property.


How to Choose the Perfect Kitchen Furniture: A Comprehensive Guide for Every Style
Posted in

How to Choose the Perfect Kitchen Furniture: A Comprehensive Guide for Every Style

When it comes to outfitting your kitchen, choosing the right furniture can make a significant difference in both functionality and aesthetics. The kitchen is often the heart of the home, a space where families gather, meals are prepared, and memories are made. Therefore, selecting the perfect furniture for your kitchen is crucial to creating a space that is both practical and inviting. Here’s a comprehensive guide to help you navigate the process and find the ideal kitchen furniture for your style.

1. Understand Your Kitchen Layout

Before diving into furniture choices, it’s essential to understand your kitchen layout. The layout will dictate the type and size of furniture that will work best in your space. Common kitchen layouts include:

  • Galley: Two parallel countertops with a central walkway.
  • L-Shape: Countertops on two perpendicular walls.
  • U-Shape: Countertops on three walls.
  • Island: Central workspace that can include additional seating.

Each layout has its advantages and limitations. For example, a galley kitchen might benefit from compact, streamlined furniture, while an L-shaped kitchen could accommodate more substantial pieces with additional storage options.

2. Define Your Style

Your personal style will heavily influence your choice of kitchen furniture. Here are some popular styles to consider:

  • Modern: Clean lines, minimalist design, and a focus on functionality. Think sleek cabinets, metal fixtures, and contemporary dining sets.
  • Traditional: Classic designs with ornate details. Look for wooden furniture with rich finishes and elegant patterns.
  • Farmhouse: Rustic charm with a focus on comfort and practicality. Opt for distressed wood, vintage-inspired pieces, and cozy dining areas.
  • Industrial: A blend of raw and refined elements. Metal furniture, reclaimed wood, and open shelving are hallmarks of this style.

Understanding your preferred style will guide you in selecting furniture that harmonizes with your kitchen’s overall design.

3. Focus on Functionality

Functionality is paramount in the kitchen, where efficiency and ease of use are crucial. Consider these factors when choosing furniture:

  • Storage: Look for cabinets, shelves, and islands with ample storage options. Adjustable shelves and pull-out drawers can maximize space.
  • Seating: Depending on your kitchen layout, you might need dining chairs, bar stools, or a breakfast nook. Ensure that seating is comfortable and complements your table or island.
  • Durability: Kitchen furniture should withstand daily wear and tear. Choose materials that are easy to clean and resistant to stains and moisture.

Assess your kitchen’s needs and select furniture that enhances its functionality while fitting your lifestyle.

4. Balance Form and Function

While functionality is crucial, aesthetics play a significant role in creating a pleasing kitchen environment. Striking a balance between form and function will ensure that your kitchen is both practical and beautiful. Consider these aspects:

  • Color and Finish: Choose colors and finishes that complement your kitchen’s color scheme. Neutral tones work well for a timeless look, while bold colors can add personality.
  • Materials: Opt for materials that align with your style and functional needs. For example, marble countertops add elegance, while laminate is budget-friendly and easy to maintain.
  • Lighting: Proper lighting enhances the look of your furniture and improves visibility. Incorporate a mix of task, ambient, and accent lighting to create a well-lit kitchen.

By harmonizing aesthetics with practicality, you’ll achieve a kitchen that is visually appealing and highly functional.

5. Prioritize Comfort and Accessibility

Comfort and accessibility are key considerations for any kitchen. Furniture should be comfortable for both cooking and dining, and it should be easily accessible. Here’s how to ensure comfort and accessibility:

  • Height: Ensure that countertops and tables are at a comfortable height for cooking and dining. Adjustable options can provide added flexibility.
  • Ergonomics: Choose furniture with ergonomic features, such as adjustable chairs and easy-to-reach shelves, to enhance usability.
  • Traffic Flow: Arrange furniture to facilitate smooth traffic flow. Avoid cluttered spaces and ensure that there is ample room to move around comfortably.

Comfort and accessibility will make your kitchen a more enjoyable and functional space.

6. Consider Customization

Sometimes, off-the-shelf furniture doesn’t meet all your needs or match your style perfectly. In such cases, consider customizing your kitchen furniture. Custom options allow you to:

  • Tailor Dimensions: Get furniture that fits perfectly within your space.
  • Select Materials and Finishes: Choose materials, colors, and finishes that align with your vision.
  • Incorporate Special Features: Add features like built-in storage, integrated appliances, or unique design elements.

Custom furniture can be a great investment if you have specific requirements or a unique vision for your kitchen.

7. Budget Wisely

Finally, establish a budget for your kitchen furniture. Quality furniture can be an investment, but it’s important to balance cost with value. Consider these budgeting tips:

  • Prioritize Needs: Focus on essential pieces first, such as cabinets and countertops, before investing in decorative items.
  • Shop Sales: Look for sales and discounts to get the best value for your money.
  • Evaluate Longevity: Invest in durable furniture that will last, reducing the need for frequent replacements.

By budgeting wisely, you can achieve a beautiful and functional kitchen without overspending.

Featured Image Source: https://images.unsplash.com/photo-1507089947368-19c1da9775ae?w=500&auto=format&fit=crop&q=60&ixlib=rb-4.0.3&ixid=M3wxMjA3fDB8MHxzZWFyY2h8MTN8fGtpdGNoZW4lMjBsYXlvdXR8ZW58MHx8MHx8fDI%3D